Friday, March 31, 2006

Homework for Dye Day

We are having a wee dye day in mid-April to dye self-patterning yarns for knitting. Our weaving group has little experience in this. We have had dye days where we dyed skeins and painted warps for weaving. I always like to pre-plan these dye days and have as much done prior to the actual event as is possible. This way I can spend more time getting the dyeing to come right vs. figuring out what I am going to make with which yarn, how long it should be or trying to complete any level of mathematics in the commotion of six to ten weavers dyeing.

We will be using procion dye with a soda ash fixer with a cold water approach. Procion is my dye of choice since it works on cottons, silks and other cellulose fibers. Since I am allergic to wool I don't do the heat approach with vinegar much. We did a order of dye from Dharma - I ordered a couple new colors for fun. I realize I could mix the various primaries to get any color...but I find it more rewarding to simply get them pre-mixed. I thought wedgewood blue and seafoam would be nice colors for summer.

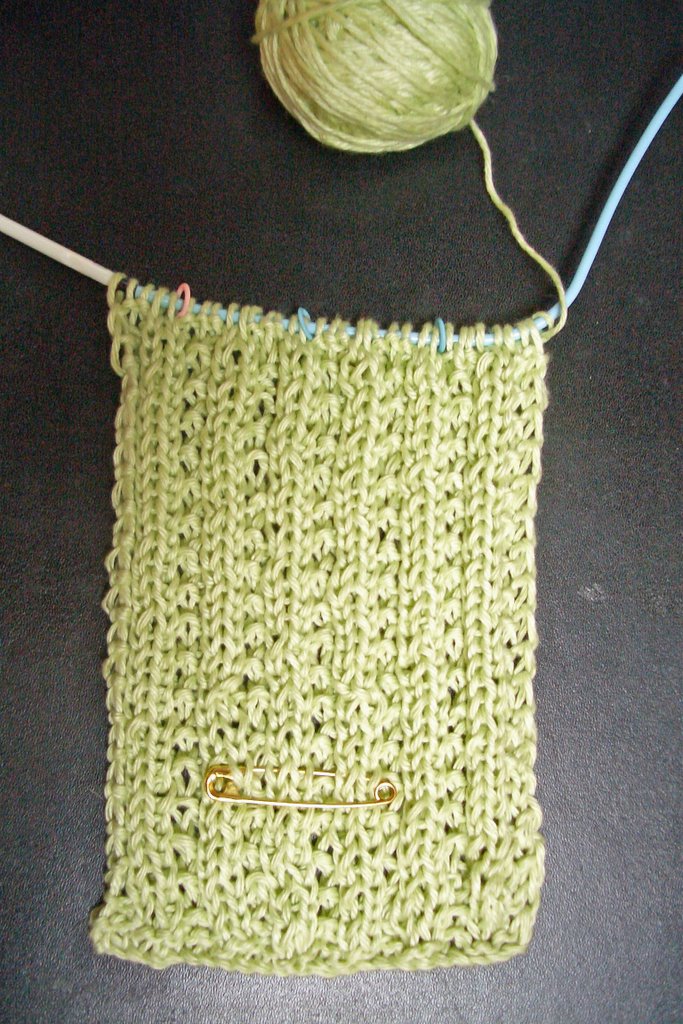
I also reviewed my stash. It is extensive and discovered two things. The first - I have lots of wool which needs to be removed from the house...so I set up a Stash Party later in April for this purpose. The second - I do not have any yarn that I can knit well which will dye well. So I ordered some from KnitPicks. The yarn is 60% cotton and 40% modal. I have never heard of modal but the dictionary said it was some type of British cellulose fiber. The cotton should take the dye fine. I wonder how the modal will dye. Perhaps, the yarn will arrive in time for some testing. I am thinking of posting a question on the Dyers List to see what the collective has to say.

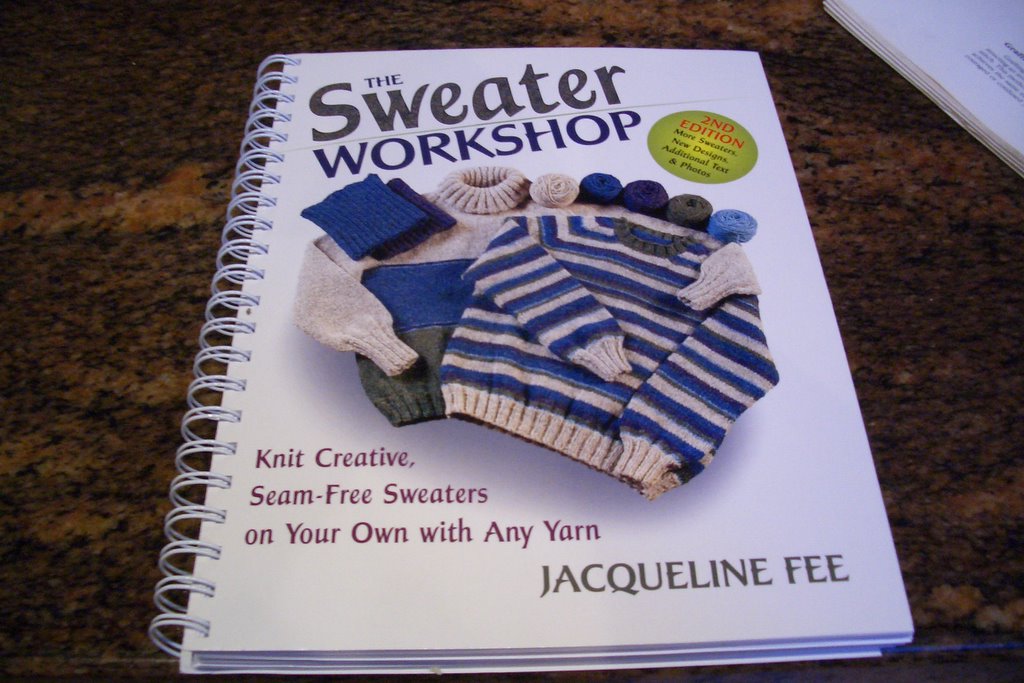
Since I know little about self-patterning yarns I ordered from the LA Public Library the book Yarns to Dye For - creating self-patterning yarns for knitting by Kathleen Taylor. It arrived yesterday. I skipped the stuff which discussed dyes and how to dye since it wasn't really applicable to what we are doing and went straight for the patterns. I really have not desire to copy their patterns I just wanted to know what patterns were possible and the basics about how to derive them.

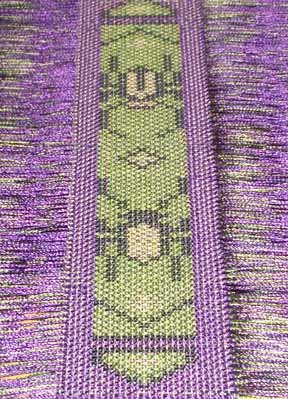
There are four different patterns; stripes, spots, zig zags and graduations of color. In the right combination you can come up with yarn that will yield that Fair Isle look without having to change yarns all the time. I'd like to try each to see how they come out.

The key to self patterning yarn is that one must come up with a forty foot skein in order to get good pattern variation and visual interest. The author has tried many lengths and this is her default length. This is a definite plus for reading the book. I would have never done a skein that long. Also, she recommends that the skein not be more than sixty rounds. So if I do my math right that is about 2400 feet or 800 yards.

It's pretty easy to get stripes. Just paint measured sections of color onto the skein. The length/width of the stripe will vary by what you are knitting. Most of the patterns in the book had 36 or 72 inches sections in one color followed by another. If the two colors did not blend well, she recommends leaving about a one half inch space between the colors to avoid blending. To get a zig zag pattern use smaller sections of color. A real precise pattern will require a yardstick as part of the process.

To get that Fair Isle knit look, dashes are handpainted onto the skein. For a spot of color 1 or 2 knitted stitches long - - make a one inch dash. For 3-5 knitted stitches of a color go for two inch dash. These spots in combination with stripes give that Fair Isle look I always see on socks.

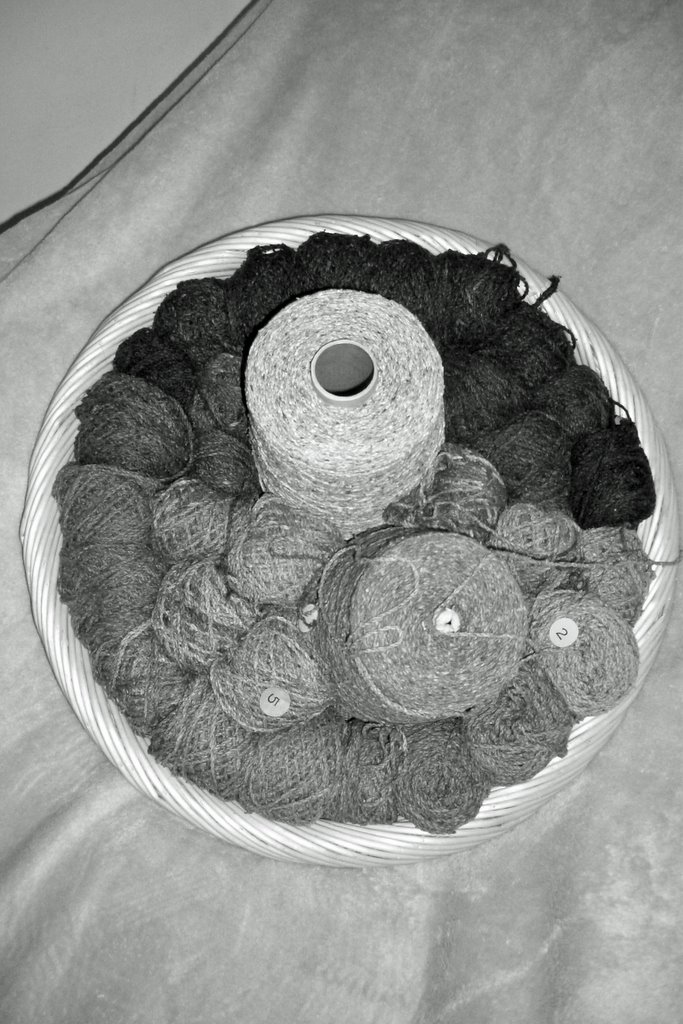
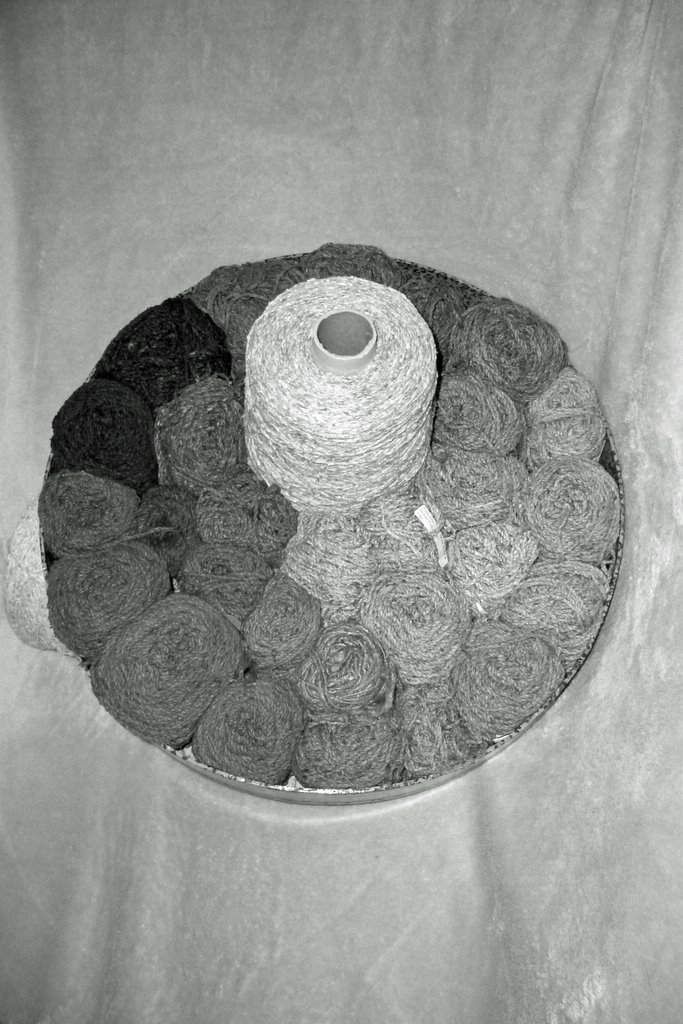
To achieve the slow graduation of color from light to dark - be warned - - it is a messy process. To get the color of the yarn to gradually change from dark to light, you start by rolling the yarn into a loose ball. The center-pull type ball will not work. Immerse the ball into the dye bath and make sure the dye soaks all the way through. Over a period of 20-60 minutes slowly remove the yarn yard by yard and drop into a rinse bucket. [I'm not sure when we apply the soda ash on this approach...prior to balling the yarn...After the ball is made...or into the dye bath. Hopefully, the Dye Master will know the answer.] The author also suggests boosting the dark color by adding some black or other dark color near the end of the process.

I won't firm up what I will dye until the mailman comes with my yarn. I do think some multiple color dashes in a Fibonacci series would be good to try for that short row knitting. I will let all this info just slosh around in my brain for a couple of weeks. Looks to be an interesting April.

Thursday, March 30, 2006

To Soumak or Not

Weaving yesterday on the big Shannock was heavenly. The movement of the sheds with the feet make it a relaxing and pleasant experience. It is much easier on the back than my baby Shannock which requires me to raise my arm to shoulder height or more to change the shed.

The hem is done and was done quite quickly. I ended up doing three slits and wove the hem in four sections. I experimented with about ten color combinations in the two middle sections. I kept the black on the sides to blend in with the black which will be on the right side of the piece. The potential colors look great and I am excited to move forward. There was little pull in. Looks like the piece will be about 22 1/2 inches wide.

I am now deciding whether to use a row of soumak or not between the hem and the rest of the weaving. I often do that since I had heard it was a good way to make sure the warp stays covered when the tapestry is folded at the top and bottom. I also remember somewhere that perhaps more than one row is good.

Yesterday afternoon I flipped through the Carol Russell Tapestry Handbook I read a few pages here or there looking for guidance. This morning I took a different approach, I let my left brain do the searching -found the index which told me the actual page for information on hems - found my answer.

Here is what it said:

'Hemming is another aspect of tapestry finishing about which there are many
theories...A favorite method of many weavers is to weave about 1 " of solid
tapestry background above the first heading, then a row of soumak knots marking
the actual edge of the tapestry. This highly recommended method,
duplicated at both ends of a tapestry, results in perfectly even hems,
well-concealed headings, two uniform edges, and the flattest possible folds in a
heavy textile.'


Oh yes! One row of soumak coming up. Who wouldn't want their hems described as 'perfectly even'... 'well-concealed'...'uniform' ... and the 'flattest possible'?

Wednesday, March 29, 2006

Ready to Rumba!

I finished up my new heddles and have warped my big Shannock....hmmm let's see that's warping it for the third time I believe. And I have yet to weave anything but a hem. I am now using a 6 epi sett and since I used the same warp...I now have an even larger piece for my first tapestry on this new loom. I am targeting a squarish piece on the order of 22 to 23 inches. I am not sure how much pull-in, if any, I will have.

I should know once I finish the hem. On the tapestry list someone said they wove their hems with slits to avoid some pull in. I am going to try that - it will keep me from the temptation of simply weaving all the way across. I get so impatient at the beginning...it seems to take so long to set up the loom, straighten out the sett, tie off the bottom with double or triple half hitches and weave a hem. All before reaching the fun part of actually creating the piece.

I did finish up my cartoon and selected different yarns and colors for different sections. I am creating a tapestry of Saturn. A couple of years ago I did one of Jupiter. One thing I might do to make the hem a bit more interesting is to blend some of the yarns I have so I can look at the different combinations and see how they look. That should amuse me through two or more inches of hem creation. [hmm... that idea was well worth getting online today and blogging!]

I figure I will be weaving for a month or so before this puppy comes off the loom. Hopefully there will no be surprises in using the loom for the first time. Here's the loom all set up and ready to rumba. It sure is huge! I am thinking of naming it Moby Dick; although I am not sure about the potential Ishmael tie-in. Barbara suggested the Big Kahuna. Neither are quite right. The name will eventually come to me.

Monday, March 27, 2006

New Heddles

I started weaving on the big Shannock yesterday and felt so good. I feel so much better weaving than knitting or crocheting. I worked up my new cartoon for the celestial piece that my heart and brain are lobbying to create next and started to weave.

I continued to feel good even though I discovered that the 10 epi sett was not going to work with my yarn. Oh, well...I just need to make some new heddles. When I bought the loom the previous artist had used 10 epi for her work and she gave me all her heddles. I also got the stuff to make heddles at other sizes. I figured before making some - why not try 10 epi and see if it would work with my yarn. Well it will work if I only want to use singles. However, since the Lynda Brothers workshop I took a couple of weeks ago I am now hooked on using at least doubles to acheive additional dimensions in my work.

So 10 epi was too small. I normally use 7 1/2 on my baby Shannock. The 7 1/2 was a bit tight when using doubles in the workshop and would have been impossible with triples so I finally decided 6 epi would be just right.

I decided to make the 6 epi heddles this evening and it turned out to be quite easy. The toughest part was the glue gun. I have little experience with guns...including glue guns. I pulled my husband aside and said 'come - - help me buy a gun'. We went to the local hardware store which had a nice selection. Picked out a mini gun in a lovely red along with some glue sticks and was ready to roll.

In the picture there is an empty heddle bar - a piece of wood about two feet long with a hole in the center. I marked them up to show 3 ends per inch. Since there are two heddle bars on my loom - each gets marked up at half the desired epi. Also, in the picture is a heddle bar holder with a heddle bar already in it and string wrapped around covering each of the 3 epi marks. The heddle bar holder ensures each loop is the same size. The next step involved glueing the strings onto the bar so they would not shift during use. The entire process should have taken perhaps ten minutes but we had to make another trip to the hardware store to pick up some glue sticks that would fit the glue gun. The hardware was closed - but the second store had what we needed. Tough to use a gun when the bullets are too big.

I turned out to be a quick learner with the glue gun...perhaps next I'll try a 45. From this picture you can see that the two new 6 epi heddle bars have loops of different materials. The instructions said to use 'string'. I looked around to see what I had in my stash - there was nothing called 'string'. Decided I would try two different things to see how they would work. One is sugar & cream - - the other is 3-2 pearl cotton. Seems to me that they should work.

Tomorrow I will install and try them out. Should be another wonderful day...weaving.

Sunday, March 26, 2006

It's Not so Scary

The latest scarf turns out to be not so scary after all. Given the right color clothes on the right person, the scarf has a new life. The scarf is now on its way to its new home in Northern California. Dogs to remain here.

Saturday, March 25, 2006

Oh My!


I have never created anything that seemed so scary during and after its creation. I am teaching my niece how to crochet this evening so I thought I would practice a bit with some of that space dyed eye lash yarn that I had lying around.

I found some rust silk which looked quite nice with the eye lash stuff. I was planning on doing a long fairly thin scarf with a long inch wide rust stripe down the middle. The eye last yarn would be on each side. I crocheted the middle rust part first - looked quite good. But as the eye last yarn came on - oh it got so scary - the colors just said boo! I couldn't rip it out since the yarn was stuck all together. I could only move forward. I quickly decided that a thinner shorter piece would be better than the original plan. I decided to go with a lei style. It's all done but I still say its too scary to wear - I may have to put this away until Halloween.

Additions to my Library


I have three new additions to my library...one knitting book on shadow knitting and two weaving books.

I wish I had purchased The Tapestry Handbook by Carol Russel when I started weaving a few years ago. I can clearly see it will become my tapestry bible. It is particulary helpful for giving clues as to what values of colors to select in various hatching, pick & pick and other shading methods to acheive specific effects. Adding more shading & depth to my tapestries is my current objective. Should provide a better lauching pad for color selection, less ripping and a happier weaver.

To be truthful, I bought this other weaving book since it had taquete in the title. I haven't been able to find any information about this technique except for what I learned in Lillian Whipple's workshop on the topic. [For a lovely example of her work.] I just kind of push along, trying different approaches to accomplish whatever effect I am trying to acheive.

Most interesting, this book has a definition of taquete. Here it is:

"Taquete: The weft-faced compound tabby structure is woven with a unit threading system, a repetitious treadling order, and a double pass of four weft picks to create two block, two-color patterns. "

Hmmm...not exactly sure what all that means but I think I have taken the technique a bit further than this definition but it still seems close enough to be called taquete.

Wednesday, March 22, 2006

Back to the Library

Seems like a good day to make a library run. I know there are lots of people on the holds lists for some of the knitting books I have sitting around. I got so excited playing with shadow weave [oops! I mean shadow knitting] I haven't much looked at the other books.

There are two:

And they are both fairly similar. Both develop knitted pieces by combining squares and triangles in a variety of ways. The real difference between the two is the yarn they select for the various projects described in the books.
1. The Modular Knits book by Iris Schreier uses multi-color dyed yarn which is knit fairly loosely in a garter stitch. Most but not all of the colorful pieces are knit with one yarn which is dyed with short bursts of color to acheive the multi colored appearance. The author is part of Artyarns which sends me 'homework' once a month on modular knitting. I already did the first assignment to knit a right triangle attached to an equilateral triangle. I need to finish the second tutorial. This is how I am learning modular knitting... a little bit at a time. The hand dyed yarn used in the Modular Knitting book is from Artyarns. I am going to dye some yarn more to my liking in April and knit a scarf in this technique and see if I like it.

2. Domino Knitting by Vivian Hoxbro gets the multi-color effect by using solid color yarns and changing the yarn during knitting. Domino Knitting also uses a lot garter and a bit of stockinette in the square patterns.

By knitting a few potholders from Domino Knitting or a scarf from Modular Knits one can easily figure out the technique. Its basically knitting small shapes together while the work progresses. From reading parts of the books, Domino Knitting seems to be more time consuming while the Modular Knits projects go rather quickly. There are no projects in either book that leap out and says 'Me! Me! Knit Me!' so back to the library these books go.

Tuesday, March 21, 2006

My Mailman was Good Today

Monday Afternoon - Late

I have been waiting for my mailman with great excitement every day since the 15th. That's the date that HGA was sending out the notices about whether pieces had been accepted to their many exhibits.

My mailman was good to me today. My 'bug' piece that I wove between Thanksgiving and New Year's was accepted for the HGA's Great Lengths exhibit to be held in Grand Rapids, Michigan this year. Whoopie! Doing a little dance...

The piece is titled It's Raining Beetles and contains 780 insects falling through a rainbow with each row a different design and different hue of the rainbow. There are sixty unique insect designs: fifty nine beetles and one ant. It was handwoven in taquete on an eight harness table loom with no computer assist. The entire piece is over fifteen feet long with over 12 miles of weft in over fifty colors. The weft is embroidary thread of 40 wt rayon, metallic, holographic and sliver.

The Juror Anna Zaharakos and Margaret Dunford made the following statement about the various pieces submitted:

"The range of work submited for this exhibit impressed us. The craftsmanship was evident in all the wroks, and the innovative combinations of materials and techniques intrigued us. We felt that the pieces of most interest were the ones that pushed the limitsof technique and combined techniques and materials in new ways. The use of color was also an important criterion: we looked for pieces that used color in innovative and sophsticated ways. We looked for interesting pieces that had visual complexity, and that revealed innovative exploration of technique, materials, and current and fresh color theory. Thank you for this oportunity; it was a pleasure to review all this great work."

I wonder how many artists submitted work for the exhibition and how many got in. I'm sure that info. will leak out soon.

In addition one of my rainbow taquete sculptures was accepted into the HGA's Celebration Exhibit in Grand Rapids. Plus, the mailman delivered a tapestry book I ordered. The mailman was good to me today! No...very very good.

Shadows

I have been playing around with shadow knitting to see how it works. I read about it in a book called Shadow Knitting by Vivian Hoxbro. Looking at the pictures in the book and reading through [several times] the first couple of chapters made me believe it was going to be a tough technique to learn. But in fact I found it quite intriguing and quite simple to do.

Shadow weave is formed by using two colors of yarn, one light and one dark. You only knit one color at a time. Every row on the right side is knit. Every row on the wrong side is an alternating knit section and purl section [or visa versa] to acheive the shadow effect.

I decided to start with the pattern in the first project - the potholder - simple stripes. Once I got four or five rows down I was bored...switched the stripes to make a checkerboard pattern and finished it off with a triangle. The best part was a table she created to more easily follow the patterns. I just couldn't figure out the table until I actually started knitting. Then it was obvious. I had tried to do something similar to this a month ago - trying to get a triangle of garter stitch to rise out of some knit stitch. It was really tough to display on a piece of paper.

In shadow knitting, by creating ridges & valleys of garter and stockinette stitch with two colors of yarn, a shadow is created which adds to the visual interest of the piece. It essentially adds another color without adding a new yarn. If you look from some directions- you really can't see the design but when looking at it from others the design pops out.

Obviously high value-low value selections of colors will make the patterns pop the most. The various clothes and things portrayed in the book use mostly black as one color and a variety of others for the second yarn. I can imagine how one could get some beautiful effects by moving down the value spectrum. Deb Menz' book Color Works would offer some good value choices to achieve specific effects. I like this technique and will try making a scarf with it. I have some lovely silk yarns that I might try. I bought one skein of every color so I could combine various colors in this technique with potentially some lovely results. Something to add to the to-do list.

For my weaving friends...doesn't this seem a bit like shadow weaving? I was never hot on that weaving technique since the warping complexity never seemed to be worth the effort relative to the finished product. Here's a picture of some samples from a shadow weave workshop I took several years ago at an ASCH conference in Riverside. Looks pretty similar...

Interesting that whenever I am asked to make a high-low value color selection I always select maroon never black as the high value color.

Monday, March 20, 2006

It's Spring!

We just bottled our latest home brew ...a Bluebird Bitter Ale...just in time for Spring. It's an all grain beer - golden in color with lovely orange tints and a flowery bouquet that reminds one that Winter is over and Spring has sprung. Available for tasting in three weeks.

This time...not only did I get to design the label I also got to put the caps on. Way cool!

Sunday, March 19, 2006

Inspiration for Dinner


The colors of Judi's bookmarks was inspiration for dinner this evening....

We walked to the Farmers' Market this morning in hopes of finding some orange cauliflower. We heard the chef from Border Grill talk about how wonderful that type of cauliflower was. At our market there was no orange...but we found these two instead. They reminded me of the bookmarks I wove last week so we decided to try them out at dinner.

There is a little olive oil, chipolte pepper, garlic salt and some time on the weber grill in their future.

How Long?

Ah my continuing issue whenever I create a scarf...how long should it be? I haven't seen any golden proportion rule for scarves in my research so it is best to look at what I have done in the past and what I like to wear... my more favorite woven scarves are shown below including my mobius ones...my little green knitted scarf is on the left - chihuahua and yardstick provided for scale.

That's my little green knitted scarf with two complete balls of yarn - it's fifty inches long...looks like I'll need a half a skein more. Although it feels nice...it looks pretty boring...perhaps I should unravel a couple of stitches on each side to add fringe for visual interest.

I will ponder that as I knit more...I have tried to put in 12 stones per day. [What's a stone? I have 12 polished pebbles in a black navajo pot. I take them out when I knit and put them back one by one as I complete one full pass of knitting]. The stones help me concentrate and ensure I get something done.

Although simple, this pattern is still a nightmare for me.

Thursday, March 16, 2006

Colors by Judi

I had asked for suggestions for color combinations for the bookmarks I am making for the bookmark exchange. Several folks asked for some purple. Judi actually sent me some pictures with four-color combinations. Here are the bookmarks I finished in one of the color combinations that she suggested.


My camera refused to take a picture of the purple dominant one in purple. It would only come out blue. I had to go into photoshop and change the hue and tint to get it to look like the actual bookmark.

The next ones on queue are

1. red/black
2. grey/pink/dark navy
3. orange, yellow & green - - like a California poppy
4. purple & yellow with a bit of orange

If you have any other suggestions you would like me to try...give me three colors; I need one darker value for the outline and two others for the center and frame. I'll vary the insides of the beetles based on what you selected. I may have to modify your choices a bit based on what thread I have available; I have a huge selection but I am weak on purple...

Wednesday, March 15, 2006

Left Leading the Right

Lots to do and nothing to photograph...so you photo hounds need read no further.

I thought I might take a moment and get myself organized by listing the various projects I am working on...this is a common technique I follow - allowing my left brain [the logical, rational and numerical side] to organize my right brain [the creative side]. I took a right-left brain test to see which side rules my life...I am 60% left and 40% right - this explains a lot about why I like some knitting books and not others...you should try the test...if you're not like me...well you probably won't love my choice in books nor the weaving techniques I use. Anyway, knowing what you are makes for some really good excuses....

I'm sorry- I can't do that...my right brain won't let me...

I'm sorry - my right brain made me do it!


On the weaving front:

1. Waiting for the results from Small Expressions,The Grand Yardage and one other exhibit to see if the pieces I submitted get by the jurors. The results are to be mailed today. If I get in, I have some 'finishing' to do. If I don't I have less finishing to do.

2. I still only have 7 of 20 bookmarks done for the bookmark exchange. My studio is a mess which makes it difficult to make progress. Is that the left brain thing?

3. I have a borrowed Varpapuu table loom with fifteen feet of sewing thread warp waiting to be threaded. I'm not excited about weaving on this loom again. I may take off the warp and put it on my Purrington when the bookmarks are done. I prefer my Purrington to the Varpapuu eight harness and by removing one table loom I will have more room and less clutter in my studio. I needed the Varpapuu since it had a 24 inch weaving width. While the Purrington has less width, it is smoother and so much more pleasant to weave on.

4. There still is some Christmas yardage on my floor loom which resides in the living room. Our entire family celebrates Christmas in our living room...that's where the tree is decorated, where the presents sit awaiting opening and stocking are hung by the fireplace with care. For decoration, I always like to put some colorful yardage in Christmas colors on the loom. I think I wove a yard or two in the Trudy Robert's California Rag technique. A couple more yards and I can make a Christmas jacket for next year. No hurry...its not even 4th of July yet.

On the tapestry front:

5. My Vintage TV is complete for the Small Format-Grand Ideas show. I am going to mail mine in with the others in my group. So its just waiting to be mailed.

6. There's the tapestry I started in the Lynda Brothers tapestry workshop this past weekend. I did make some progress on the rings. More is required.

7. My mom gave me her antique counterbalance loom. It's got a tapestry of Death Valley on it. My, my, my how many years has that been there?

8. My big Shannock is warped and ready to rock. I have an idea for the piece...just need to draw out a cartoon and get going. I think I'll finish my workshop tapestry first since it is on a similar theme.

9. Oh yes, and I have My Mom to weave. The rigid heddle loom is warped, the cartoon drawn and the yarn selected. I'm mulling over what I learned this weekend and need to decide how to incorporate those concepts into that piece. I'd say it's on hold until after the Big Shannock piece gets completed. Although if I push through the mulling I could weave this at our tapestry group meetings. Something to consider.

On the knitting front:

10. I picked up three quite exciting new books to look through from the library. Domino, shadow and modular knitting...sounds quite left brain don't you think?

11. I have that soft wonderful celery green scarf - my first knitting project. It seems to be taking forever since I am constantly making errors. I am on the second skein...it probably needs three.

12. I started a diagonal scarf similar in shape to a style I saw in one or two knitting books that I read. I am using some of that wiggly yarn that I used in the scarf I just finished. Except the yarn is green. I am using the woven stitch I discussed in a previous blog. That woven stitch really compresses the yarn. I have only done a couple of inches and might switch to bigger needles to make it a bit softer and wider.

13. Then, I have my TV knitting. Just a ball of off white chenille which I am knitting on circular with wild abandon. This is in preparation for dyeing in April. I plan to KDFroK (technique discussed here) a few pieces.

14. Oh, and I just got exercise #2 from ArtYarns. I am going to learn to square off a triangle. What fun - and from someone who liked algebra better than geometry!

Wow...that's an embarassing list! I've got to get some stuff done here. Think I'll go weave!

Tuesday, March 14, 2006

Back to the Library

I have a bunch of non-fiber related activities to do today but am hoping to fit in a quick trip to the library. I got another notice from the LA Public Library informing me I they have two more knitting books ready for pick up. So I need to go through that last knitting book I have so I can do a 'refresh' on my knitting reading.

If you like thick, heavy and bulky scarves...here's the book for you; Just Scarves: favorite patterns to knit and crochet by Lion Brand Yarns. Some of the scarves are knitted others are crocheted. If you see a scarf you like - you can tell exactly which yarn, how much to buy and what size needles to acheive the effect illustrated. My climate is not cold enough for these scarves. I doubt I will ever look at this book again.

I did take note of one scarf that was made of triangles combined into squares which joined as you knit. It was called a Jellybean Miter. I didn't care for the yarn illustrated but I think it might be fun to do with some hand dyed yarn. Dyeing yarn is my April project - hopefully when it is warmer. I am happy they showed photos of both the back and front of this scarf. The backside had raised lines where the triangles connect which made the scarf have an interesting design on the 'wrong' side...or perhaps it would be the 'right' side. There is also a nice crocheted scarf that I think my niece might like to crochet but I think I'll make it simpler since she is new to the sport.

I do hope I can slip in some weaving today too. I finished weaving my planet and am now working on Saturn's rings on my workshop piece. I was further but didn't like my first try at the rings so I ripped them out. Does one frog or tink a weaving? I think not. Ripping things out that have been knitted is...how to describe it...it seems so liberating and fun...with weaving it's just plain sad.

Monday, March 13, 2006

My First Knitting Thrum

I could show off my unfinished weaving from my tapestry workshop this weekend but I'll wait until it is finished to take a picture. The workshop itself was great...the only improvement would have been some background music. There was a great deal of tension in the air from the concentration of 15 tapestry weavers warping their looms and weaving. I think some Hawaiian slack key guitar in the background would have been perfection.

After warping looms, we created our own design with some squares at the beginning so we could practice joins and and we were to include a triangle and a circle. I took a celestial view for my piece. And on Sunday I started weaving. I am about half done with mine and hope to finish this week. I've never had a class in basic tapestry weaving so it was quite interesting. When you learn from reading a book, you run into things not discussed so you kinda fudge it. It is comforting to hear that some of those fudges are typical techniques of tapestry artits.

So how is the knitting? ...my knitting friends ask...

I finished my first knitting scarf with just a small amount of yarn left. It took close to 250 yards of yarn. Sure sounds like a lot for such a light scarf. I guess if I easily carry a weaving with 12 miles of sewing thread weft I should be able to comprehend 250 yards of yarn in a scarf...

I saw a fringe I liked in Knitting on the Edge by Nicky Epstein and thought I would turn it into a scarf with that orange wiggly yarn I bought. The seed stitch was easy to knit; I could even knit watching TV and listening to a lecture at my Guild meeting. However, I didn't try to knit during the slide show...too dark. I cast on 21 stitches, did seed stitch for a couple of yards and cast off all but three stitches. I tied off the 4th stitch and unraveled the remaining three. This created a nice fringe on one side which I tied off in square knots. I was planning on adding beads but the fringe with the wiggly yarn seemed quite enough...no need for additional embellishment. Overall, I like how it turned out. I don't care too much for the feel of the yarn. It's acrylic - which would probably be OK if the scarf was heavier. It is so light you don't even notice you are wearing it. Perhaps beads would have added the necessary weight. I think I may try this again but in a different yarn.

I really like the Knitting on the Edge book. I am intrigued by the ruffles, lace and fringe. All have lots of possibilities in my mind for inclusion in future projects. The colors of the pictures make the pieces just pop out of the page. It's as if you can see into the crevices of all the stitches. Each chapter uses a different color in the photos, so its easy to find a new chapter. This book may end up in my knitting library.

Friday, March 10, 2006

That Warm Feeling

I always love that feeling of accomplishment...the big loom is now warped...again...another beetle bookmark woven...and my stuff is all ready for my weekend tapestry workshop with Lynda Brothers on shapes and joins. And I just got a notice from the LA Public Library saying I have some more knitting books ready for pick up. So, let's take a look at a book by Nicky Epstein called Knitted Embellishments:350 Appliques, Borders, Cords and More! : so I can return it before picking up more books.

Knitted Embellishments is like an encyclopedia of stuff - a reference tool. It's similar to Vogue Knitting: the Ultimate Knitting Book that my husband gave me for my birthday. So my issue here is - - what interesting things are in this book that are not in Vogue Knitting.


  • First of all there are tons [80+ pages!] of knitted flowers plus fruits & veggies - all types, shapes and colors. I'm not the knitted flower type but the upcoming ASCH conference in Visalia has a theme of wildflowers so those chapters might be useful.
  • There are about 40 pages on things to do with I-cords...I was intrigued by one comment that said:
    "for some knitters, knitting cord is therapy and they enjoy making yards of
    it."
    This means it may be something I can knit while watching TV. I haven't found any knitting I can do while watching TV - - I still make way too many mistakes when I do not focus, focus and focus. As for I-cords - I have only done them in stockinette. Apparently one can use lots of different stitches - - garter, a reverse stockinette, tube, seed, cable...and the list goes on. Since I was considering using these cords as a design element in one of scarf design this is a useful chapter. There are also lots of tassels & fringes.

The instructions look clear and easy to read. I haven't tried any yet. Although I think I'll try some of the I-cord and see how they come out. The photos are clear, clean and appear non-touched up. The format gives the book a warm comfortable feeling - you end up thinking 'I can go this' vs. that overwhelming feeling of 'wow these look way too complicated for me' one can often get from a reference book with slick photos and small font. I think I will keep this book - Knitted Embellishments: 350 Appliques, Borders, Cords and More! on my for reference list and borrow it from the library when I need it.

Thursday, March 09, 2006

My New Favorite Weaving Tool

So what is my new favorite weaving tool? It's the level!

How else to tell if the fifteen feet of beetles are hanging a bit crooked on the wall or if that weft on the tapestry loom is on straight or sinking a bit to one side?

Wednesday, March 08, 2006

It's That Sinking Feeling

Tough day...nothing completed...or at least nothing to photograph... spent the afternoon re-warping my new six foot tapestry loom.

There were three reasons for re-warping:

FIRST: I couldn't figure out how to keep the weft from sinking down and around the lower beam. The instructions said I had to wind at least one full turn of warp around the lower beam before I tightened the tension. That leaves lots of room for the weft to gradually sink as one beats. I had wove some thick yarn in first, followed by some twining and double half hitches but nothing seemed to keep that weft from sinking down and around the beam.

SECOND: The heddle bar was set too low as well as the cartoon holder. When we put it together we weren't one hundred percent sure how everything worked so we just put things where we thought they made sense.

And FINALLY, the warp was starting to have that frayed look so I figured I might as well re-warp with stronger warp material. This loom can really set a tight tension. I have never woven on anything that can get that tight.

I sent out a SOS on the tapestry list to see if anyone had any suggestions for my sinking weft. Some of the ideas included -

  1. Weave a header with cotton seine twine warp. Expect it to sink a bit especially at the sides but level it by filling in with the cotton twine. I should weave to the point it stops sinking and remains level. Then twine, weave another warp header and twine again before starting the tapestry.
  2. Another idea is to weave in old one inch plastic Venetian blinds slats to provide a solid base. They provide a straight filler which will not sink.
  3. Begin by tying the warp as a weft to the side of the loom; weave across, tie to the other side, weave back and tie back to the starting side. Do three and a half passes through the warp and tie it each time with strong tension. Do the spacing weft passes next. Then weave the tapestry. If and when the warp needs to be forwarded, remove the tied ends on the sides - the tapestry should not slide on the warp.

I am trying out the second idea. One of my friends saw the posting and called saying she had some of those slats from Venetian blinds under her loom collecting dust. They are now dusted and waiting on my studio floor to be woven.

Tuesday, March 07, 2006

Woven or Knitted

To continue my review of knitting books from the LA Public Library. This one is really fun and a definate mood lifter. Knit Scarves; 16 Cool Patterns to Keep You Warm by Candi Jensen. I am still smiling just remembering the book. A wide varied selection of scarves; all looking fairly easy to knit. Great photos, cheerful colors and the knitting tips have wonderful visuals. This one has potential to be in my personal library although I may quickly grow out of it as my knitting experience grows.

I sampled something called a woven stitch. It is supposed to be like weaving. And yes, it does come out like that. In fact it looks pretty similar to the material I wove to make Chili who is modelling with the book. The 'woven' stitch is a nice square flat stitch - much more uniform and pleasant than the garter or stockinette stitch. With that description I am sure you can tell that I prefer it to the others. I'm not sure why I would knit something that I could weave..but I guess I really can't carry around my eight harness table loom!

Monday, March 06, 2006

Warping the New Loom

I was in the mood to warp...so I decided to put a test warp on the big Shannock loom I got earlier this year. I have never used the loom before and am looking forward to seeing how it works.

I have a tapestry class this weekend so I can use the test warp to practice any new techniques once the class is over. I also want to figure out a good sett on this loom for my yarn. Once I figure that out I'll need to make some heddle bars with the right epi. The loom came with some at 10 epi so I am trying them out first.

You can see the heddle bars in the picture. They are handmade by putting a heddle bar into a holder, wrapping the string around the bar and attaching the string with a glue gun. Once dry, you take it out of the holder and voila - - heddle bars. Brilliant!

I have the loom warped but am not sure how to keep the weaving from slipping down as I beat it. The warp wraps around a bottom cylinder and it needs to have at least one full turn of warp around the cylinder prior to tightening the warp. To start weaving, I packed in some thick yarn, did some twining, wove a bit then added some soumack. The weaving still shifts downward. Perhaps I need to use that closed 1-2 soumack or simply put some pieces of cardboard in the bottom before I tighten up the warp.

PS. I was able to slip in some fun knitting yesterday...I knitted a right triangle and an equilateral triangle a la the instructions from the 'short row' tutorials I signed up for from Artyarns. Apparently I will get an email with some new technique every week or so. I was using some variegated chenille from my weaving stash which seemed to work well. I prefer the triangles to be a bit subtle vs. having each in bold colors or stripes. I may try a wider triangle next.

Saturday, March 04, 2006

Satisfaction

Nothing more satisfying than a "50% off all sewing thread" sale at Joann's. It's the only time to buy Sulky thread for my weavings.

Remember I mentioned that I had put on hold a slew of knitting books from the LA Public Library? Well, they are now coming in fast and furious. Got an email indicating four more have arrived at my branch. I had better hurry up and get through the ones I already have here!

Vogue Knitting: Scarves is a cute little book. I always like those little books - particularly when they are packed full of information with beautiful pictures and good ideas to boot. This book is a valuable one for me at my current beginning stage of knitting. It had a great table that answered those questions as to what a fingerling, or sport weight or Aran type yarn was. The table lays out all the various terms and weights. I remember being on a website in search of some yarn and no idea what all the terms meant. Now I just have to figure out what kind of yarn I like to knit with and what type of scarf I would actually wear.

Any ideas in the book for my Unique Scarf Project? Yes, there were several - - but much of the scarf ideas...how do I put this...were 'dated'....or perhaps 'done before'. Oh did I mention the photos were excellent? They actually show both sides of the scarves not like the last book I looked at. I bet there were quite a few surprised knitters who tried to knit that scarf and expected both sides to look like the picture! Kudos to the photographers & editors on that point.

For my scarf project, I found the scarves with triangular ends interesting as well as the modular designs. The alternating chennile with rayon ribbon made appealing stripes. To capture all these various ideas for my scarf I am creating a collage which incorporates the parts of the various photos that I find interesting. Since I have a colored copier it is quite easy to do. I found the collage idea in the Illustrated Discovery Journal; creating a visual autobiography of your authentic self by Sarah Ban Breathnach.

One more book I think I can quickly cover here...ScarfSTYLE; innovative to traditional, 31 inspirational styles to knit and crochet. Yes, the ideas are innovative and inspirational; each designed by a different person. I liked the I cord fringe on the long side of one scarf designed by Kathryn Alexander. I loved flipping through the book, looking at the different designs - - not the traditional things I have been seeing in other scarf books. But having gone through the book several times I realized there was one really big problem with this book for my scarf project. I would not wear any of the items pictured in the book!

Off to the library to return and pick up more books!

Friday, March 03, 2006

Value Me This

Time to consider whether I have the right yarns for this tapestry or whether I will need to go dye some more. I'll start off with reviewing an article I wrote for our Guild newsletter last year...

I had the opportunity to take a workshop from Sara Swett on Pictorial Tapestry at the ASCH conference in Escondido. I had seen Sara’s tapestries at Convergence as well as on her website and had wondered how her tapestries achieved such detail and vibrancy. The answer is Value.

In a nutshell, here is one way to improve your yarn choices for a tapestry.

1. MAKE YOUR CARTOON: Many people start off making a cartoon from a colored photo, picture or drawing. Put that colored cartoon through a regular copier to get a black and white copy. Or if you draw – draw the picture with a black pencil – using varying shading in the different areas to indicate depth, shadows and light. This cartoon gives you a roadmap to improve your yarn selection.

2. YARN SELECTION: Take a black and white photo of the yarns that you might use in your tapestry. Use that photo to make sure the value of the yarn you are going to use is the same as that in your ‘value’ cartoon. In this way your tapestry will have greater depth and vibrancy. It really is that simple.

Does your digital camera have a ‘black & white’ mode? If so, you have a valuable tool to add value. Here is what I am doing. I put my camera in ‘black and white’ mode and look at my yarns. I don’t take a picture; I just look through the camera and move the yarns around until they are in five value categories from lightest to darkest. The camera, allows me to easily see which ball of yarn is in the wrong category. I can also look at the tapestry while in progress to see how close it lines up with the ‘value’ cartoon.

If you would like to learn more about Sara’s workshop check out Ruth’s blog .


Could you tell which ribbon weaving was mine on Ruth's blog? It was the one with the light blue frame and orange background. Perhaps you noticed, the tapestry was woven with wool weft on a wool warp. Not only did I learn at the conference about value but more importantly I also learned I was allergic to wool!

Below are my pictures of my yarn in both color and B&W.


Looks like I have a nice selection of values in these yarns even though I do not have any white. The lightest color I have in this yarn in natural - the undyed stuff. It's in the middle of the basket of cool greens. It is my lighest value. Happily I have some good dark values in both the cools and the warmer reds. These will be useful in acheiving the right mood. More on mood later.

Getting in the Tapestry Mood

My tapestry group meets twice a month on Fridays...and it's Tapestry Friday!

Time to get in the tapestry mood...

I have dozens & dozens of cones of a beige silk/cotton blend that I use for my tapestries. You will remember that I am allergic to wool, so the standard tapestry yarn options are not for me. I dye the yarn with Procion into the colors and values that I need. Here are the color selections for my next tapestry. They are what I call wine country colors. They were my mothers favorites.
This will be a large tapestry for me. The cartoon is six feet tall and 18 inches wide. It is a rendition of My Mother. She was a weaver in Napa Valley and when she passed I got all her looms and yarns. That's when I started weaving. I've tweaked the cartoon a number of times...the last tweaking was to modify the body and face dimensions to follow the divine proportion. I found this great website that visually portrays the ratios on the human body. Quite amazing that the figures work out that way!

Now this mention of dyeing has reminded me of the knitting technique I thought I might try from Sara's website. She knitted some yarn into a rectangle, dyed it, frogged it and then knitted it all over again into a gorgeous shawl. I'm going to nickname this technique: KDFroK...pronounced Cadeefrock...for knit, dye, frog and knit. KDFroK might be a good technique to incorporate into the knitted scarf I am designing. A great way to have stripes which change color without any discontinuity on either side of the scarf. More on that later.

Thursday, March 02, 2006

Two Feet

Well what have I been doing? Knitting of course. I can see how people can get addicted to this sport. I have heard many knitters have lots and lots of canvas bags each filled with different unfinished knitting projects. Well, it's time to get organized; I am going to try to keep to one or two knitting projects max at any time. I can't let knitting keep me from weaving.

My green beaded ribbed scarf is coming along nicely. No picture...just look at the last photo and imagine it two feet long. I must admit I did rip [ah should I use the technical term 'frog'] it all out twice since that photo was taken. As a weaver, I know that edges make the difference...we always looks at the edges of a woven piece to see how good the weaver really is. So I always try to have nice edges; it's the professional thing to do. My knitted edges were not to my liking -- not particularly uniform. I reviewed my bible, The Sweater Workshop for what to do. If the last stitch on the previous row was a knit then I should slip the first stitch as if to purl with the yarn in the front; if it was a purl then slip it with the yarn in the back. I finally got that straightened out, knitted a bit and discovered my edges still were not pretty & uniform. Upon further study, seems I had memorized my stitch pattern wrong.

Over the last three days, I have spent the first hour of the day working on this scarf to make up for lost inches and time. I have now finished my first ball of yarn; whoopie! Looks like I will use the other two that I have in the same color...a six foot scarf seems like a good length. That length works for woven scarves - - should work for knitted ones.

I was on Amazon looking for a knitting book and instead of buying it, thought perhaps I should see if was at the library. Wow, the LA Public Library system has a slew of knitting books scattered all through the plethora of branches in LA. I ordered about twelve of them to be delivered to my branch. I'm hoping they have interesting ideas for things to knit. I am not inspired to do a sweater - too massive of a knitting job. I'd like to create an interesting and unique scarf; one that I could wear in Southern California where it is usually warm. Plus, one that is not too wide nor made of wool. Plus, additional requirements - - it should not be a scarf that I could have woven, it should look really good on both sides and should not have been done before. I don't think that is too much to ask.

The first book to arrive was Knitting Pretty; simple instructions for 30 fabulous projects by Kris Percival. Reading through the book gave me a warm and comforting feeling since I actually understood the entire book. It was a quick read. I thought indeed the title was fairly proper - the instructions were quite simple in a nice format and the photos were great. I picked up some pointers on adding yarn and how to do a seed stitch. As for fabulous ideas...that may be stretching. As for any ideas for next project - the my unique scarf...none. But there were two pretty funny & fabulous ideas I wrote down for potential Christmas projects.

  • One was a knitted beer holder - that made me hoot a bit. It was like a striped wrist band but the band goes around the mid-section of the beer bottle. My husband is a micro-brewer and creates a special batch of beer for his friends as Christmas/New Years gifts. I always get to figure out how to decorate them...well next Christmas each beer may all have their own knitted bottle mitts. As the book says, they don't keep the beer cold but they can keep the hand warm.
  • The second idea which also made me hoot was a scarf - a wiggly worm scarf with two buttons for eyes! It's a scarf with some decreases at the tale, some shaping at the head, and the entire snake-like appearance occuring from the natural curling at the edges of a scarf knitted in stockinette. I was thinking I could create some really long snakes in perhaps silver and have them drape around the Christmas tree decorated with red balls and sparkling lights. What a hoot!

I'm off the library again...I have more knitting books to pick up.