Nothing like seeing the end of the warp in sight to spur me on to 'finish it up'!
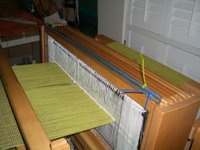
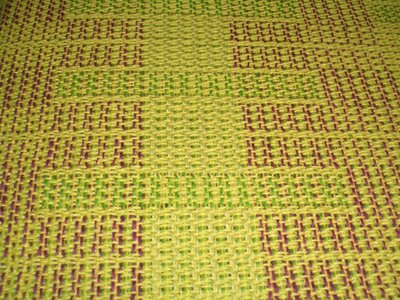
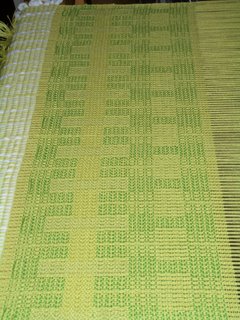
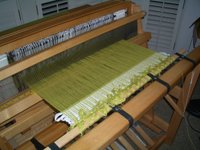
Just wove the last towel on this warp and immediately cut it off. I took a photo of the entire yardage all spread out in the hallway. The pattern and colors look better off the loom than on. The five different variations on summer and winter show well. I am not sure which I like the best. The dukagang looks quite neat and angular. The others have that more old fashion handwoven look. It will be interesting to see how they look after primping, washing, ironing and sewing.
I ended up with six towels, ranging from 29.5 to 34.5 inches. The width is about 21 inches unwashed. Amazing how that beat can really change the length here. I am sure it has to do with the fact I was only weaving only two pattern repeats at a a time. The last towel I had to reduce the number of repeats within each pattern by a third since I needed to keep a bit of warp available at the end to tie on the next warp. So the last towel is about 22.5 inches ignoring the hem. It may not be big enough for the exchange.
Next I am going to tie on a second warp. I have never tied on before...probably because I never have actually woven two warps back to back with the same pattern. But I would like to make a few more towels for gifts so this looks like my time to try it out.
Thursday, August 31, 2006
Tuesday, August 29, 2006
Baby Blue Eyes
I continue to plod along weaving my summer & winter dish towels. I think I have completed four, perhaps five...I stopped counting. I am thinking the end of the warp may be in sight...perhaps one or two more towels to go. My beat has become quite regular and much lighter than the first towel...each pattern repeat has grown by an inch...given that there are five pattern repeats per towel then the towels will be five inches longer...hopefully they will shrink more. I would hate to exchange dish towels the size of a beach towel!
I weave first thing in the morning on the towels...who needs light with a repeatable pattern. For a challenge I am trying to weave some taquete [almost] free form to create some yardage to make wildflowers. Here is my first attempt.... the camera does not do this justice...the yardage is much closer in color to the flowers and much less pink. I don't want to use white so I am using a metallic light lavender thread for the middle of the flowers and it seems to push pink in the photo. The pattern is quite subtle; you can only see it clearly in the right light from the right angle. Perhaps a bit too subtle...
I am going to go a couple more rounds with the baby blue eyes then move on to Sierra Gentians, poppies and flax.
Monday, August 28, 2006
Bookmark Exchange
Our Guild had their annual summer picnic this weekend and it included our fiber bookmark exchange. Take a peek at what I got in exchange for my bookmarks...way cool!
The instructions were fairly simple...make a fiber bookmark for each person participating in the exchange in time for the annual picnic. This resulted in an an incredible variety...pressed flowers, paper collage, knitting, crochet, tapestry, plain weave, shibori, needle weave, quilting and nature printing. And they all came with a wonderful story.
Thursday, August 24, 2006
Just Love Hardware Stores
Don't you just love hardware stores? I do. I just love walking up and down each aisle seeing how I might use a specific object in a manner for which it was not originally intended. Just last Sunday, during a leisurely stroll through OSH I discovered the answer to my messy shed problem.
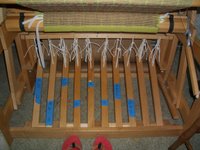
The problem arose since I could not get the treadles perfectly balanced. Two shafts would rest above the other six on top of the loom when the pedals were not in use. I could weave with it that way...just had to push down the two shafts whenever they caused a gap in the shed.
In this summer and winter pattern, I need to use all ten treadles. It's the first time I have ever used them all. Two treadles are used for the tabby and the other eight for the pattern. It turns out that shaft one and/or two are used on all but one of the ten treadles. This causes an imbalance which no different tie up combination or order would fix.
Going back to my stroll in OSH...I found some plated metal rods which I thought might solve my messy shed problem. My DH attached the rods on the top of each of the two shafts which were popping up. He used those plastic cable ties. The rods were heavy enough that gravity did its thing and brought the shafts down to the correct position. And now I have a lovely clear open shed on every pass.
Hardware stores are good.
Tuesday, August 22, 2006
One Done...many more to go
Just finished my first towel. Much to my chagrin, I discovered one of the pedals was tied up incorrectly - a minor change...only one shaft was off...and it's tough to see any difference in the pattern. Whew!
Now, I just get to weave away; a couple hours a day in the morning. Great upper arm exercise - throwing all those shuttles back and forth. The only real issue is what colors to chose for each towel. I need a dark, a medium value and one or two light values. Here are the cottolin choices I have.
For the towel in the recent photos, I used the violet situated two spots from the right, the dark purple three from the left and the lightest green in the front for the pattern wefts. The warp used is the smallest avocado colored cone which I also used as the tabby.
Next I think I will go with a greater value constrast. I won't be sure until I start weaving...
Monday, August 21, 2006
On the Way
I finished my sample towel and learned a few more things. There was another treadle tied up incorrectly, I need some reminding on how to serge the ends, there was quite a bit of shrinkage and as already noted the color palette was wrong.
But it is now Monday and things have been 'fixed' on the loom and the new palette in place. Here is what the real thing will look like...well, at least the first one. I figure I can finish a couple towels a week and still do lots of other stuff.
Thursday, August 17, 2006
The New Palette
Here is a close up of my yardage with the new palette.
Most interestingly, an entire unit of pattern is 216 throws of the shuttle! That comes out to 6.25 inches per pattern unit. That means I need only 5 or 6 units per towel.
I am doing the sample with five units - each a variation of summer and winter. So far I have done pair x's, dukagang-fashion and singles. The one shown here is singles. I will do the alternate dukagang and pair o's. If I need another six inches I could add pair x's with the tabby reversed. But I am hoping five will be enough for a good sized towel.
If all work out nicely I may do all the dish towels in as summer & winter samplers. So for the weavers out there who receive my dishtowels...they can serve double duty - not only do they dry dishes - they also provide an illustration of the varieties of S&W.
I found one error in the pattern which made violet show up when it should be green in a given block. It is now starting to look more like ribbon. Overall, it is still a bit too green for what I had in mind. I may try on the next one to use two shades of purple and light green. I think that is actually what I had originally intended.
Wednesday, August 16, 2006
Shake Down
Here is the result of the shake down process for my 'ribbon' dish towel yardage. Its good I did the shake down...at least five threads needed 'fixing' and one pedal was tied on incorrectly.
I must say that it does indeed look like dish towel yardage. I don't quite see the ribbons going in and out of each other in the pattern, but I had the tabby and the medium pattern weft be the same value which is not exactly correct. But I didn't have enough of the right sized bobbins at the time. I do now.
Another issue is that I am using the same size yarn for the pattern, tabby and warp. Apparently on summer and winter the pattern threads are traditionally two times the diameter of the tabby and warp so they slide nicely into place. I don't mind the look and feel of what is coming out.
My reference, says that if you want a balanced weave it normally takes two repeats of a given pattern part...my weave is not balanced at two times...nor is my taquete for that matter... I think I would need a wider sett than 24 epi but I like how it feels at this sett. I'll need to finish a towel - who knows how it will look after washing and finishing.
Have you read that challenging the mind helps keep Alzheimer's away? For example, they recommend doing cross word puzzles or that card game Concentration. Well, another thing to add to the list is to weave this summer and winter pattern - not only does the mind have to stay in concentration mode but the entire body gets a workout as I throw three shuttles back and forth and push down pedals with a span of about a yard. I find this much more difficult than taquete on a table loom. It will be a slow weaving process. Although it should speed up once I get the hang of it.
Next I will switch to my desired palette of yarn colors and see how it comes out.
More Bookmarks
Missed yesterday due to computer crash...so two posts for today... Here are the bookmarks for our Guild's bookmark exchange - after about an hour of finishing.
I first trimmed the loose threads off the back and applied some acrylic gel medium to the ends where I did not weave the ends into a triangle. I am always looking at different ways to keep the ends from unravelling. I initially had the idea of just weaving each end into a triangle shape and tying it off so it would not unravel. Really tough to do on one end...and even on the 'easy' end it was slow going. So I reverted to other ideas.
I used my sharpest and longest scissors to cut the bookmarks along the two areas of fringe and went over the sides several times making sure they were as straight as I could get them. I played around a bit with the tops and bottoms but ended up just cutting most of them straight across. I tried beads on a few but found I had not left enough empty warp to really use beads effectively. I had planned to leave more empty warp between each bookmark but I got nervous that I didn't have enough warp...so I made the spaces smaller.
I then wrapped them in plastic and slapped a label on the back describing the piece. All I have to do now is to decide which thirteen to bring to the Exchange!
Monday, August 14, 2006
Towel Season
It's that time of the year again...time to make some towels for the Cyber Dish Towel Exchange. There is still time to sign up- the sign up deadline is August 30th. Towels must be woven, hemmed, mailed and received by the end of September. I did it last year and got some real fun towels back. But I must admit - I liked my towels the best. The magentas, reds, and purples were quite a vibrant color palette.
This time I am going to use the same yarn as last year, a cotton linen blend from Webs plus add some new lighter and mid- value greens to punch out those magenta/purple colors even more than last year. I bought some cottolin from Loominesce which I will be trying out for the first time. They have a nice selection of colors. The stuff from Webs although in fabulous colors made a nightmare warp. This new stuff warped up fairly well.
I am weaving a polychrome summer-winter weave structure in four colors which requires six shafts so I am using my eight harness floor loom. The weave is supposed to look like ribbons woven in and out of each other... that assumes I can select the right colors to go in the right places. The warping, set up and I suspect the weaving is fairly complex - particularly for a dish towel. This is the first time I have ever had to use all ten pedals for the tie-up. I don't quite have them balanced correctly since my sheds are not beautiful yet. I even had to review how to tie those snitch knots for the pedals.
Next, I will be weaving a sample to thrash out any issues like mis-threading, crossed warps or uneven tension. I have already identified four warps that need to be fixed. I going to use a set of greens for the sample so I can use the material to make some leaves for another little project I have going on the side.
After the sample, I will then do a towel in the color palette I will be using to make the six dish towels for the exchange. Once the first one is complete, I will probably remove it from the loom and wash it to see how it comes out. But who knows, perhaps I will just go for it and weave them all.
After the first warp is gone, I want to try tie-ing on a new warp to the old warp so I got an additional color to try out. And once those are made, I can tie-on a partial warp to do the lapel for my Christmas jacket. Ah - what a plan!
Friday, August 11, 2006
More Details
Here are a couple more shots of my yardage for my Xmas jacket.
This is a close up of the fabric strips. I take the fabric and cut it up into strips a bit smaller than one half an inch. I leave about an inch uncut so the strips will stay in order - I do want the pattern to come out! When I weave, I simply cut off the next strip, place it in the shed facing the right direction and laying flat, open the next shed and beat. No folding nor ironing. The fabric seems to fold itself. Next the weft yarn goes into the shed and I 'lock' the weft yarn around the the last fabric strip so it won't unravel later. That's it. Makes for a pleasant weaving time - productive and methodical.
Here's a better picture showing both sides. This fabric was a batik so the back and front are fairly similar. The front has some gold leaf painted on. The back does not. The two sides look different largely due to the warp. I warped the piece so that red warp came up on one shed and all golden yellow lifted on the other shed. I had originally intended to use the side with the yellow warp showing for the outside of the jacket. It's less 'Christmas-y' and perhaps I could wear it through out the year but the red side is quite beautiful...hence my thoughts of a reversible jacket.
Thursday, August 10, 2006
My Wine Country Jacket
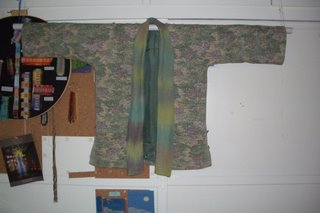
Here is the jacket I made last year in the California Rags technique that I did after a workshop by Trudie Roberts on finishing techniques. My Christmas jacket will have a similar style.
The fabric unwoven looked like a table cloth with giant grapes. The women at the store asked me if I was making a tablecloth! When I explained to her that I was going to deconstruct the fabric by making fabric strips and re-construct it by then weaving it with chenille - she gave me this kinda dazed look.
The giant grapes in the fabric compressed once woven in strips. I used a variegated yellow and green chenille for the weft yarn which alternates with the fabric strips. The lapel was hand painted silk warp done in a plain weave. I experimented with many finishing techniques. There is piping which matches the lining around the lapel and on the sleeves There are lined hefty pockets and fabric covered buttons. The sleeves are also lined so when folded up the lining can show if so desired. This was fairly complex to sew...at least for me...it's the third piece of clothing I have ever sewn - and without any pattern. I also seem to have a problem following patterns so a no-pattern jacket for me is a plus!
The fabric is heavier than the Christmas fabric I just wove, so my new jacket should be a bit lighter than this one. This one is only for cool days.
Wednesday, August 09, 2006
Christmas Yardage
I got myself all organized again with things to accomplish each week for the next year or so.
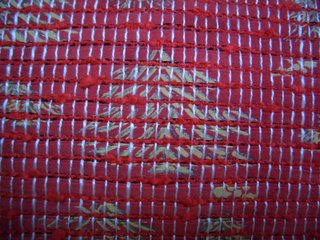
This is what I needed to finish this week. This is the yardage I started last Thanksgiving to have on my loom in the living room during Christmas - last Christmas. A little red for the holiday cheer. This year the goal is to turn this yardage into a jacket.
It is done in that California Rags technique that Trudie Roberts teaches in her workshop. You buy fabric with a bold print and cut the fabric into strips and weave it alternating with some yarn. This fabric had little yellow and gold trees on it. I used a bright red slubby cotton yarn to alternative with the fabric strips.
To avoid having bulk at the shoulders you have to weave the yardage with the pattern going up for one yard and down for the following yard. I have four yards completed for the front, back and sleeves plus I wove the remaining fabric to give me an extra ten inches for something - perhaps a sleeve extender or pocket.
Since I had more warp left I did some speed weaving. Speed weaving is where you go as fast as you can with wild abandonment and no real care about the edges. Finished up the warp doing about an inch a minute. Its interesting that when I don't really care about the edges my selvedges come out good. I have about thirty inches of plain red weave...it may make a nice low key hood for the jacket.
Yes, the two pictures are of the same material - I took a picture of each side and the digital camera distorted the color a bit due to the warp. On one side only the red warp shows, on the other there is a yellow warp showing. This digital camera made one picture browner and the other more orange. No time right now to enhace the photos. But the true color is closer to the first one.
I needed to finish this up quickly since I committed to weaving some dish towels and I wanted to do them on my eight harness floor loom. Once the towels are done I will use the same sleying for some material for a lapel for the jacket.
Look for more progress on the jacket in...let's say October.
NOTE TO SELF: I should also take some pictures of the fabric I bought in Molokai for future jackets or vests and put it into my file for inspiration...and on here too...
Monday, August 07, 2006
A Conga Line of Beetles
Here are the bookmarks I took off the loom the other day to rest. I am participating in another bookmark exchange, this one requires 13 bookmarks made in any technique just as long as it is made of some type of fiber. They are due to be exchanged at the end of the month so there is plenty of time for finishing. Once I get the others back I will load them all onto the Fiber Bookmark Exchange blog for all to admire.
I used black warp to explore how it impacts the color of the pieces. I like the effect - the colors come out much more saturated and intense. I also tried to vary the way the pieces were finished at the ends. Since I am using black warp with a black woven frame all the way around the piece, having black fringe at the bottom will look good. I should end up with 24 bookmarks...enough for the exchange, enough for my sample book and enough for Christmas presents.
I found some nice plastic paper to wrap them in at Michaels. By wrapping them, it's OK for people to handle the pieces and I don't have to worry about them getting dirty or snagged on anything. Since the plastic is clear, you can see the front and back. I am going to try signing the back with fabric paint and see how that works too.
But no finishing of these bookmarks until I finish the yardage on my eight harness floor loom. I need that loom for another project. The yardage I won't need until the holidays and hopefully by then I can also squeeze in a summer and winter lapel for the holiday jacket I have in mind.
Sunday, August 06, 2006
The Shadow Grows Longer
And there is some progress on my shadow knitting...last time you saw this scarf it looked like this. As you can see it has progressed a bit.
I found that if I laid my knitting out in plain sight next to my table loom, I would end up taking a weaving break and knit a few sets. So all this recent progress was done as I worked on a recent guild project - a fiber bookmark exchange. [more on that tomorrow]
This shadow knitting takes some thought. I always need to have my little directions near by. No knitting this scarf while sailing-although I must say the color selection is turning out quite nautical. Hard to believe the dye is called wedgewood blue.
I wonder sometimes why I make these things so complicated. On my first real shadow knitting project - - did I really need graduated dyed yarn...did the scarf have to be on a diagonal...did I have to have the shadow stripe circle up the scarf...Ah well...I think it looks pretty cool on both the front and back.
I am not sure I like the three stitch straight border on the sides. I may end up removing that and transforming it into fringe. I am trying to figure out if that would wreck the triangular shape of the scarf. I think if I am careful and not pull the yarn too much when I knot the loops it will work out...but I have lots more time to consider finishing as I knit on.
Friday, August 04, 2006
Water Lilies
Over the last month, I also accomplished some of my least favorite things... finishing.
I worked on framing two of my tapestries. Of the two, one is without question a tapestry. The other might not be considered a tapestry depending upon your definition. There were days upon days of discussion on the tapestry list on whether the so called 'tapestries' from Magnolia Editions were indeed tapestries. I find the distinctions and arguments on this tapestry issue somewhat saddening and reminiscent of the political diatribes going on today.
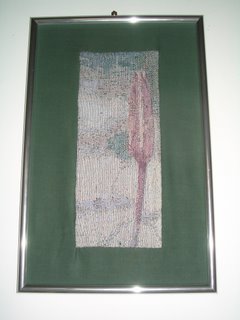
But anyway, here's a photo of my jacquard weaving called China Lily. This is the one I did in the three day workshop I took at Convergence on Color Optimization. It was woven on a TC-1. With seven colors of rotating warp, a color palette of sixty colors is created through color optimization. Of course, in this piece the color range is not that broad. I doubt there are more than twenty colors used here.
I sewed the piece onto linen and wrapped the linen around a backing. There was a bit of puckering in a few places around the edges but pretty good for my first time framing this way.
It looks nice with the companion piece I wove a couple years ago from the same photo . I took the photo while visiting in China during a previous life.
Thursday, August 03, 2006
Back at the Computer
Ah yes...I am still alive...let's see what are my excuses for not blogging since early July ... hmmm... vacation... heat... computer problems... administrative c*$p... Guild stuff... all those little things that should only take a moment and end up sucking up the day...
Enough of that. I am back on track. I have been doing some weaving, knitting and artistic stuff and things have been completed.
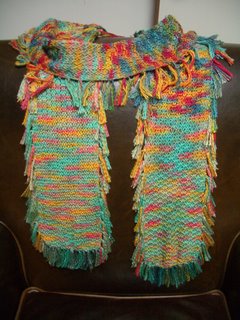
As a start I have finished knitting my fringed seed stitch scarf - this is the one I was working while sailing on the Napa River.
Hard to believe, but it is August and this is only my third knitting project. [Well...not counting those I-cords...] I do like how this scarf came out. I may even wear it when it gets a bit cooler. It's quite long - about ninety inches with fringe and very soft. Looks nice swung around the neck and down the sides.
The yarn is that 60% cotton 40% modal from Knitpicks. I took four balls put them into two skeins and dyed the skeins with leftover dye from dye day. Although I used the same colors on both they turned out to have a high value contrast. You can see a bit of the higher value contrast stripe near the top. I think the difference in value contrast was due to some grey color that I used on one skein but not the other. I forget what it was called. Perhaps the Dye Master will remember. The seed stitch was a good one for me...easy to remember where I was but complex enough to make me pay attention. Probably a good one good for keeping 'Al' away.
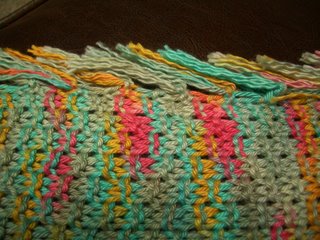
I opted for fringe down the sides to add some visual interest. This is how it was looking without the fringe - kinda boring. I have noticed a number of people trying to figure out how I got fringe all the way around the scarf. It is quite easy. The fringe on the long sides is done by not chaining off the last three stitches on each side of the last row and allowing them to unravel. For safety I tied the loops in a square knot in case the dogs got hold of the scarf. The fringe on each end had to be added on. I then evened off the fringe and unplied the yarn making fringe softer and fuller.
Subscribe to:
Posts (Atom)